ActivForce provides real-time measurements to quantify progress in strength and mobility training programs. ActivForce 2 functions as a handheld device to provide force and angle measurement when connected to an easy-to-use mobile companion application. Download the free ActivForce companion application from the Apple App or Google Play store.
ActivForce Kit Components
- ActivForce 2 Device
- ActivForce Mobile Application
- ActivForce Dashboard
- Rounded Pad
- Arched Pad
- Foam Insert
- Silicone Cover
- Hand Strap
- Leg Strap
- Belt
- Belt Loop Plate
- Custom Carrying Case
ActivForce Walkthrough Video
Connecting the Device to the Mobile Application
ActivForce Software Versions: iOS 1.7+, Android 1.7+
1. Turn on the device by pressing and holding the device button until you see a blue LED flashing. A BLUE flashing light indicates that the ActivForce 2 device is available for a Bluetooth® connection to the companion mobile application.
2. Bluetooth needs to be turned ON for the phone or tablet. If it is OFF, the app will remind you to turn it ON.
3. In the ActivForce app, start a measurement or select "Connect Device" in the settings menu. A list of available devices will be shown in the app. Tap "Connect" next to your ActivForce 2 device in the list.
4. When the Bluetooth connection is established, the device LED will flash green periodically. A GREEN flashing light indicates the ActivForce 2 device is connected to the companion mobile application.
5. The app offers two main types of tests and associated reports:
Force Measurements: Strength tests with left and right side options that report measurements in pounds, kilograms, or Newtons.
Range of Motion Measurements: Active and passive options to obtain angle measurements in 3D space.
A Settings menu is available to set test parameters such as test duration, number of tests, and measurement units. A "Contact Us" page is also available to send a message to ActivBody Customer Support.
6. Turn off the device by pressing and holding the button until you see a red LED blink. Multiple RED continuous flashing lights indicate a low battery charge level and that the battery needs replacement. A single RED flash indicates that the device has been turned off.
Note: Always start the app and pair the device through the in-app “Connect” dialog in the app. Pairing the device through your mobile device’s Settings screen without pairing in the app will result in an error. If a pairing error occurs: close the app, turn off Bluetooth in your device’s Settings, turn Bluetooth back on, and pair the device again through the app.
Using the ActivForce Mobile Application
Download the ActivForce mobile application from the Apple or Google Play Store.


Using the Activforce 2 Mobile Application


Using the ActivForce Web Dashboard
The ActivForce web dashboard, available at https://activforce.activbody.com, displays saved force and angle measurement test reports. Reports are saved to the dashboard when you use the “Save and Exit” button on the ActivForce mobile application. Sign in to the ActivForce web dashboard with the same email and password used in the ActivForce mobile application. After a successful sign-in, saved test reports will be displayed in the dashboard.
A test report in the dashboard will contain the information recorded during the administration of the test.
The dashboard will also contain all test summaries for a client in a Client Report, accessible by clicking on the “Client Report” link from the dashboard home page.

ActivForce Web Dashboard
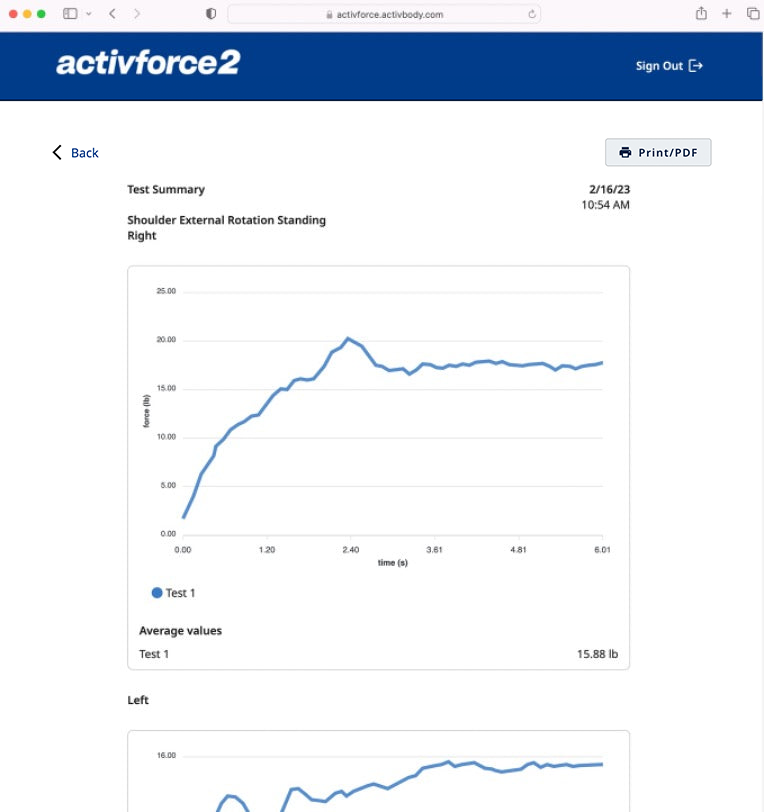
Test Summary from ActivForce Web Dashboard
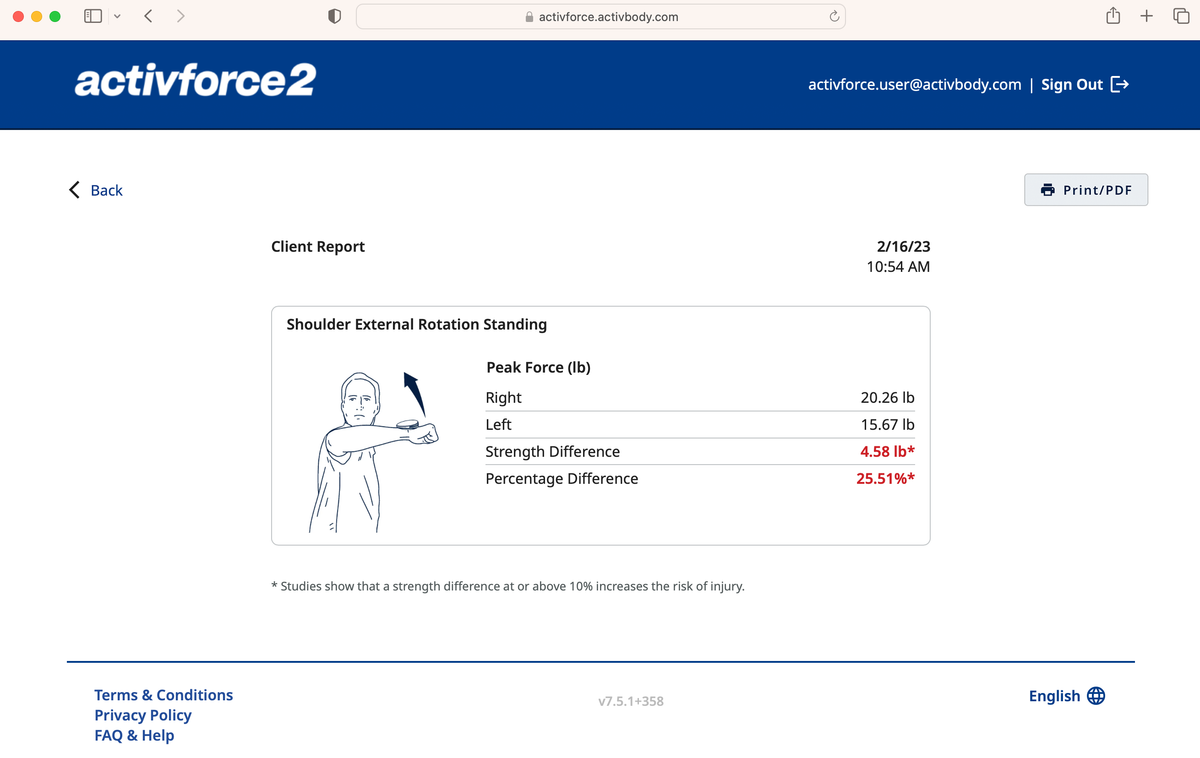
Client Report from ActivForce Web Dashboard
Attaching a Pad to the Device
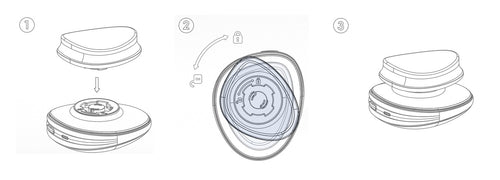
The locking mechanism is a circle with four wide gaps that securely hold attachments in place through a twist lock mechanism. To secure an attachment to the ActivForce 2 device:
1. Align the attachment teeth with the locking mechanism gaps.
2. Push the attachment teeth down into the gaps.
3. Twist the attachment clockwise (toward the locked symbol) a full quarter turn.
4. When locked, the attachment will remain in place.
Proper Usage of the ActivForce 2 Device
Measuring Force
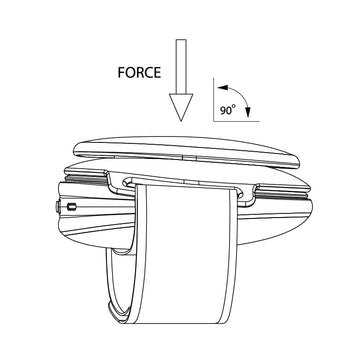
The ActivForce 2 device measures accurately when force is applied in a perpendicular direction to the large surface areas of the device or an attached pad. Application of the force should be in the center of the surface as much as possible. Direct all force into the device directly perpendicular through the device's center point.
Do not apply force in a non-perpendicular direction to the device.
Do not apply force at an angle or in a direction going across (parallel to) the device.
Do not apply force on or near to the blue band of the device.
Do not apply a force during the three-second calibration period before the application starts the force measurement.
Do not move or shake the device during the force measurement.
Measuring Range of Motion
The ActivForce 2 device can also measure angular displacement for range of motion testing. While the device is calibrating, make sure that the device is being held still in the starting position.
Do not rotate the ActivForce 2 device in multiple axes during a measurement.
Do not move the ActivForce 2 device in multiple planes of motion during a measurement.
Do not rotate the device during the brief calibration period before the application starts the range of motion measurement.
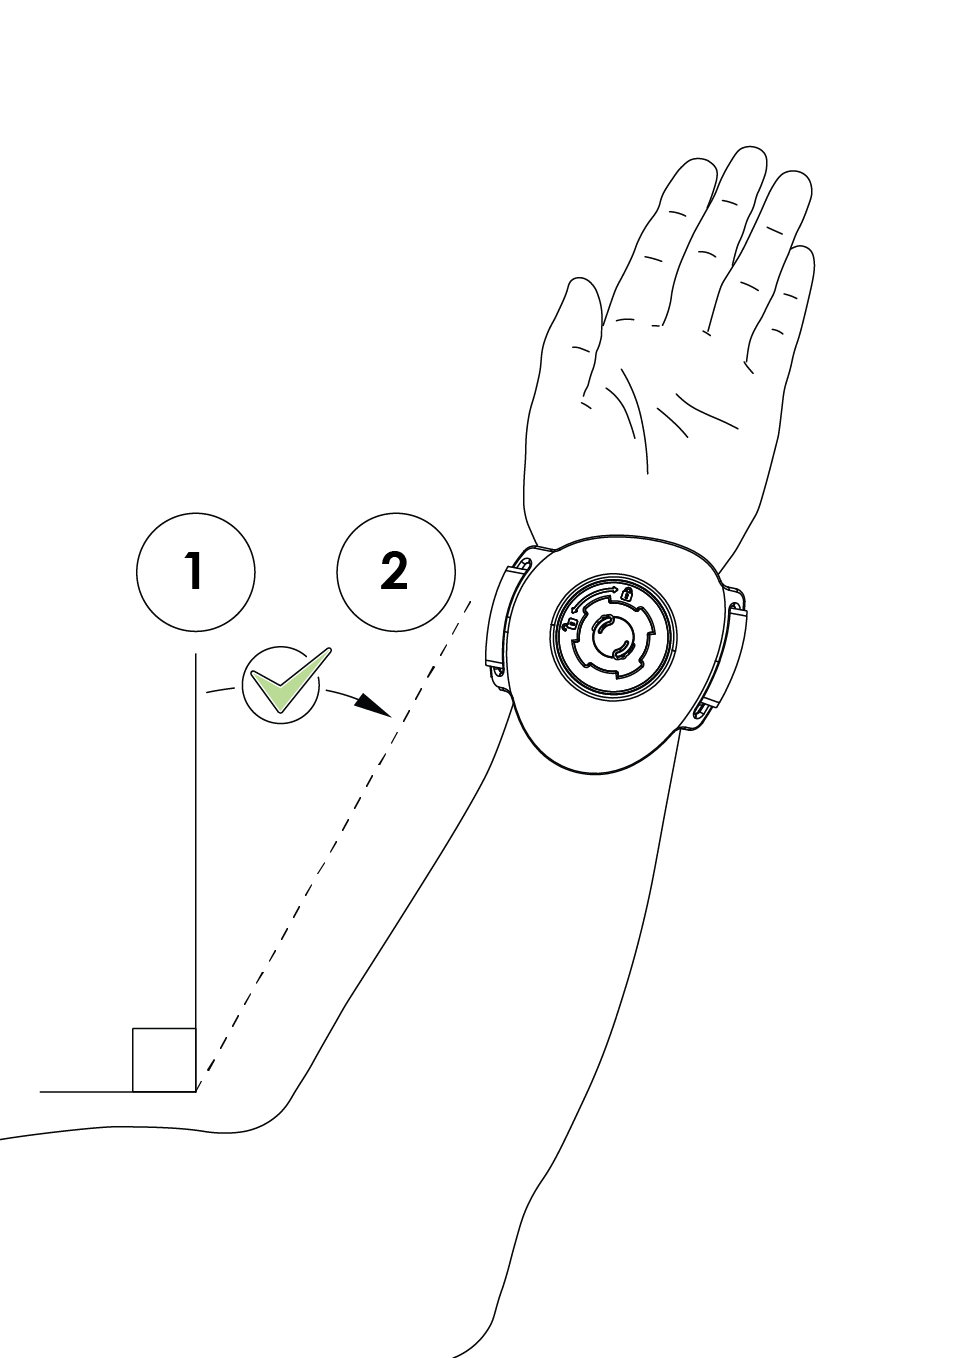
Place the device and/or subject into the starting position for test measurement and press the “Start Test” button.
After calibration, move the device from the starting position (Position 1) to the ending position (Position 2) through ONE plane of movement only (frontal, horizontal, or sagittal).
Do NOT move the arm back to the starting position while the app is still measuring range of motion. Returning to the starting position before pressing “End Test” will result in an inaccurate reading.


Measuring Range of Motion
The ActivForce 2 device can also measure angular displacement for range of motion testing. While the device is calibrating, make sure that the device is being held still in the starting position.
Do not rotate the ActivForce 2 device in multiple axes during a measurement.
Do not move the ActivForce 2 device in multiple planes of motion during a measurement.
Do not rotate the device during the brief calibration period before the application starts the range of motion measurement.


Place the device and/or subject into the starting position for test measurement and press the "Start Test" button.

After calibration, move the device from the starting position (Position 1) to the ending position (Position 2) through ONE plane of movement only (frontal, horizontal, or sagittal).
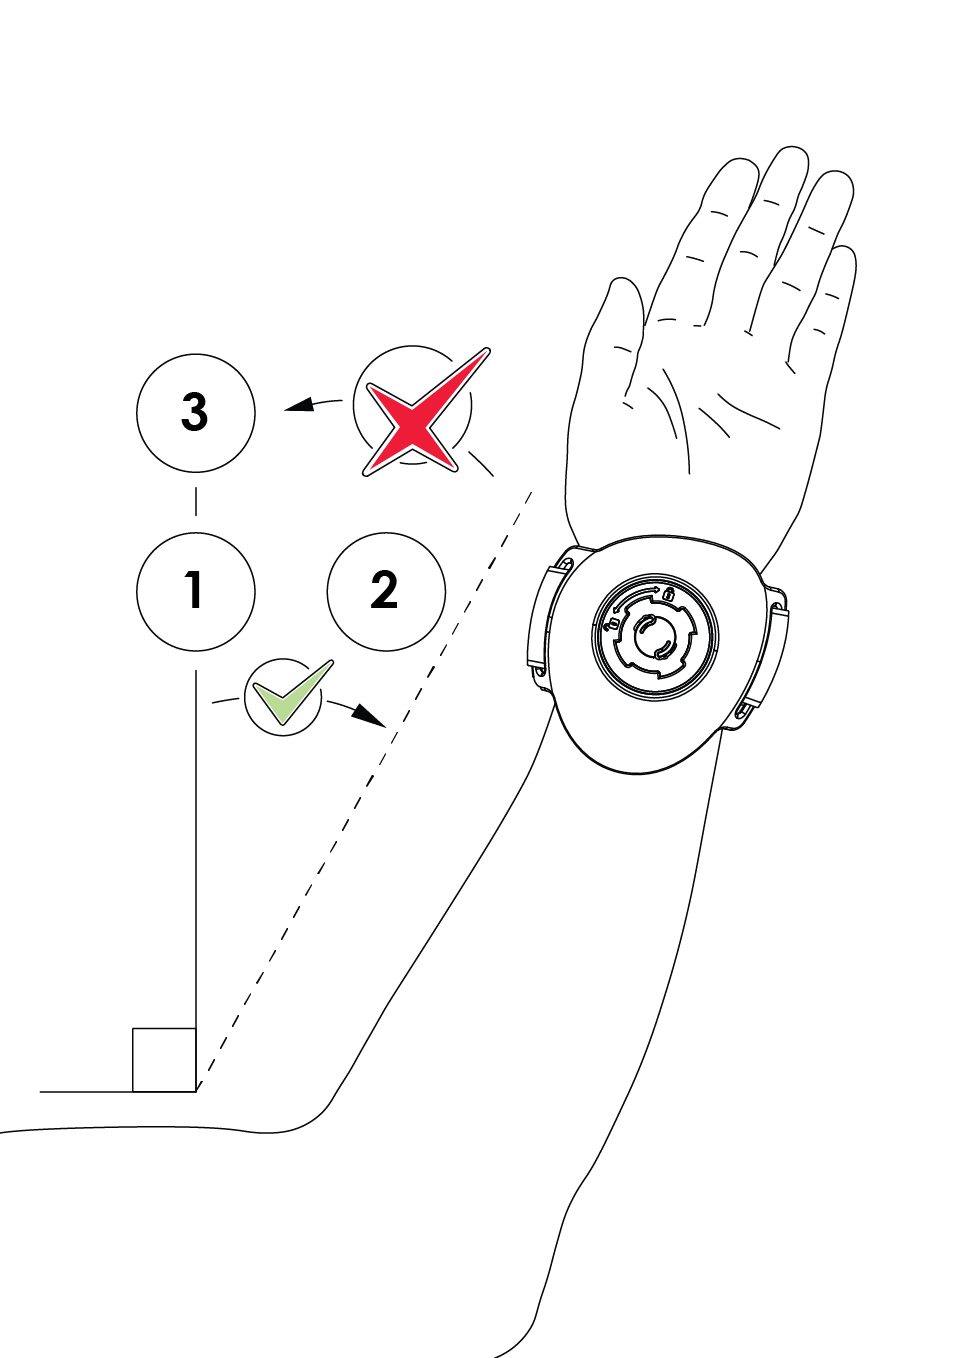
Do NOT move the arm back to the starting position while the app is still measuring the range of motion. Returning to the starting position before pressing "End Test" will result in an inaccurate reading.
App Security
Sign in and out of the app or use the security features on your mobile device to ensure data privacy. Your data within the app is encrypted and accessible only with your username and password.
Do NOT share your username or password with others. Always comply with local regulations on data privacy.
The Hand & Leg Straps
The Hand Strap
When using the Hand Strap attachment, ensure the strap is securely fixed in position. The Hand Strap may be used to secure the device to the user for strength and range of motion tests.
The Leg Strap
When using the Leg Strap attachment, ensure the strap is securely fixed in position. Use the Leg Strap to attach the device to the subject's larger body parts for range of motion tests.
Threading the Hand and Leg Strap
Thread the strap through both loops with the logo face up and the plate face down. Place the device so that the locking mechanism fits into the hole in the plate. Slide your hand between the device and the strap. Pull the non-logo side across your hand. Pull the logo side over and secure the velcro. Use with desired attachment.

The Different Pads
Using the Arched Pad
When using the Arched Pad attachment, ensure the attachment is securely attached in the locking mechanism. Use on hard or bony body parts for strength tests. The curve of the Arched Pad surface can be used to place the device against curved body parts.
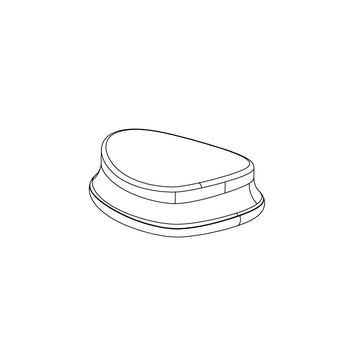
The Rounded Pad
When using the Rounded Pad attachment, ensure it is securely attached in the locking mechanism. Use this pad for all grip strength measurements and when bracing a test position against an immovable object.
The Foam Insert and Silicone Cover with the Arched Pad
Use of the Foam Insert and Silicone Cover is optional. For additional subject comfort, the Foam Insert can be attached to the Arched Pad by removing the adhesive backing and adhering it to the surface of the Arched Pad. The Silicone Cover can be secured in place using the grooves in the silicone to fit around the Arched Pad, providing a non-porous surface which can be easily cleaned and disinfected between uses.To ensure accurate measurement and prevent the slippage of the device or Silicon Cover during measurement, force should ONLY be applied in a direction perpendicular to the Pad surface.
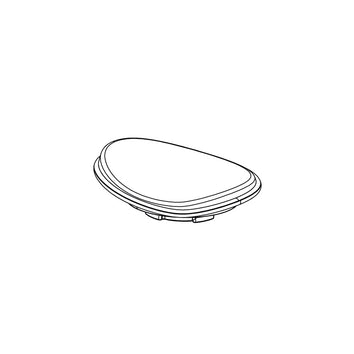
The Arched Pad
The Foam Insert, Silicone Cover and Arched Pad
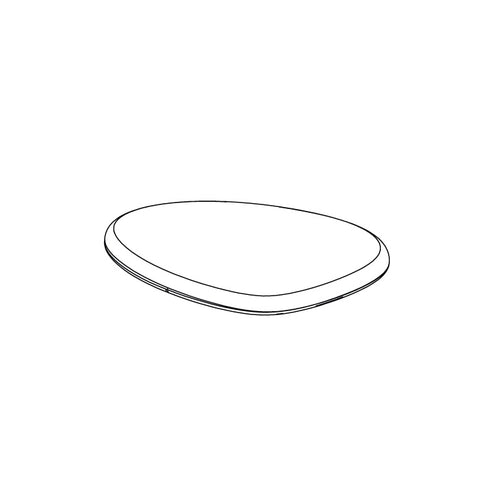
The Rounded Pad
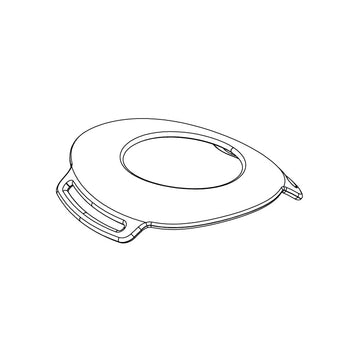
The Belt Loop
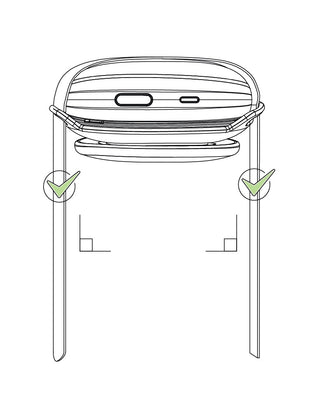
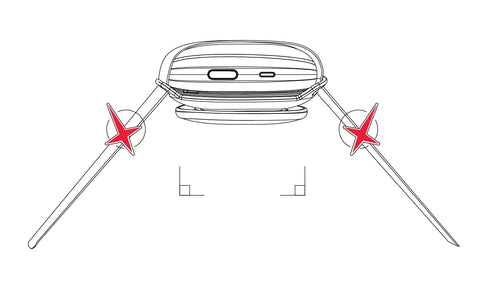
When using the Belt Loop Plate attachment, keep the belt positioned perpendicular through the loops to reduce strain on the belt loops.The plate is designed to hold the belt in position during a test and it is not designed to withstand force from a test. No force should be applied on the loops for a more accurate measurement. Keep the straps parallel to the direction of applied force so the force is transmitted to the device. Ensure the belt is wrapped over the smooth side of the device and not over the attachment side of the device.
The Round Pad with the Belt Loop Plate is recommended when the device is being pressed into the inanimate object.
The Belt Loop Plate may be used to guide the belt when the device is strapped to a fixed or immobile object.
Cleaning and Disinfecting the Device
To prevent the spread of infection and diseases, the ActivForce 2 device and pad should be disinfected between each use. The ActivForce 2 device's external surfaces, including the rounded pad and the soft, arched pad silicon sleeve, can be hand wiped at room temperature with a soft cloth and a cleaning solution consisting of 70% isopropyl alcohol and water. After application, the cleaning solution should be allowed to evaporate completely.
Alternatively, a cleaning solution of 1% hypochlorite and water (10,000 ppm) can also be used to wipe the device, pads and silicon sleeves. Antibacterial hand sanitizing agents such as non-alcohol wipes or alcohol-based hand gels may also be used. Any residue from these agents should be wiped away using a soft, dry clean tissue or towel.
Replacing the Battery
The ActivForce 2 device comes with a standard AAA battery, which lasts between six to twelve months, depending on usage and environmental conditions. To replace the battery, follow these steps:

Obtain a new AAA battery and a medium size flat-head screwdriver.

Hold ActivForce 2 device and the screwdriver with the pad attachment mechanism facing upwards. The Activforce logo should NOT be visible.

Insert the tip of the screwdriver in the small opening near the power button and gently turn the screwdriver until a CLICK sound is heard and the bottom shell lid pops slightly open. This opens the first of five latches on the bottom lid.

Gently slide the screwdriver clockwise along the edge of the ActivForce 2 device, keeping the tip inside the gap between the lid and the device until it is about an inch and a half away from the original opening near the power button.
Stop sliding and gently turn the screwdriver until a CLICK sound is heard. Continue sliding the screwdriver around the edge with the tip inside the crevice, stopping every inch and a half to turn the screwdriver to pop open the latches of the bottom lid. The bottom lid can be removed when four to five of the latches are opened.


Warnings and Contraindications
The ActivForce 2 device should NOT BE USED when:
The user and/or subject has a known allergy to silicon or plastic materials.
The skin contacting the device or pad is damaged, irritated or otherwise not healthy.
The device or attached pad is visibly damaged.
The device is in an environment with high heat, humidity or pressure.
This information is provided for general informational purposes only and is not intended as, nor should it be considered a substitute for, professional medical advice. Do not use the information on this website for diagnosing or treating any medical or health condition. If you have or suspect you have a medical problem, promptly contact your professional healthcare provider. The information on this website is provided “as is” without any representations or warranties, express or implied.
Troubleshooting
If the ActivForce 2 device does not connect with the mobile companion application, ensure that the application has Bluetooth permissions on the mobile device. For some devices, the ActivForce companion application also requires Location permissions. If connectivity problems continue to occur, follow the instructions to replace the battery or make sure your mobile device is supported.
The ActivForce mobile application performs a tare operation automatically before each measurement, during the calibration phase. In addition, the device can also be manually tared. To tare the device, select “Calibrate Your Device” from the settings menu of the ActivForce mobile companion application.
To perform a hard reset of the device, remove the battery and re-insert it after 10 seconds. The battery and the removable pads are the only user-serviceable items.
For further assistance, complaints or comments, please contact
Additional Information
Safety
The ActivForce 2 device is certified to be compliant with all required safety standards and regulations, including electromagnetic compatibility and hazardous materials, for all territories it is distributed in. This includes these standards: IEC 60601-1 (Safety) and EN 60601-1-2 (EMC).
The ActivForce 2 device is not waterproof and should not be immersed in water or other liquids.
Similar to many electronic devices, the ActivForce 2 device contains flammable materials and should not be exposed to flames or other excessive heat sources.
Service Life
The ActivForce 2 device has a service life of at least 30,000 cycles, or force measurements.
Disposal
In the European Union, the symbol below indicates that the product should not be disposed of with other household waste. Batteries should be discarded separately, and the device should be deposited at an appropriate facility to enable recycling. Please separate these items from other types of waste and recycle them responsibly, following your local government’s disposal guidelines.
ActivForce 2 Device Specifications
Device Dimensions
Weight: (with AAA battery) 4.8 oz / 137 g
Length: 3.7 in / 9.5 cm
Width: 3.1 in / 7.8 cm
Height: 1.3 in / 3.3 cm
Volume: (approximate) 8.5 in³ / 139 cm³
Device Functional Specifications
Force Measurement Range: 0 to 200 lb / 0 to 90 kg
Force Measurement Accuracy: ± (1.4 lb + 5% of the applied force)
Range of Motion Accuracy: ±1° for angles measured from 0° to 33°, ±3% of the measured angle when > 33°
System Requirement: Android 8 or higher, iOS 13 or higher
Connectivity: Bluetooth 4.1
Operating Distance: Up to 7 ft / 2 m from mobile device
Battery: 1 AAA battery
Battery life: Approximately 6 months, may vary with usage or environmental factors
Operating Temperature: Range 32° to 95° F / 0° to 35° C
Storage Temperature Range: -13° to 122° F / -25° to 50° C
Operating Humidity Range: 15% to 93% relative humidity
Operating Pressure Range: 20.7 in Hg to 31.3 in Hg, 700 hPa to 1060 hPa
Case Dimensions
Weight: 29.5 oz / 835 g
Length: 14.2 in / 36.0 cm
Width: 6 in / 15.2 cm
Height: 3.94 in / 10.0 cm
Volume: (approximate) 334 in³ / 5,472 cm³
Accessories Dimensions
Hand Strap Length: 13.5 in / 34.3 cm
Hand Strap Width: 1.5 in / 3.8 cm
Leg Strap Length: 31.5 in / 80.0 cm
Leg Strap Width: 1.5 in / 3.8 cm
Belt Length: 97.6 in / 247.9 cm
Belt Width: 1.5 in / 3.81 cm
Contact
ActivBody, Inc.
4350 Executive Dr #200
San Diego, CA 92121
United States
support@activbody.com